Wildeye Rain Gauge Installation Instructions
Ensure your tipping bucket rain gauge is installed correctly which will lead to accurate measurements of rainfall.
Remove rain gauge from box and secure bird spikes.
Bird spikes can be installed on the top rim and inside (1 spike) the cone of the rain gauge. This will ensure no birds will land on the gauge and fill the cone with their droppings. As shown in the image below there will also be a U-bolt and screws for mounting the rain gauge.
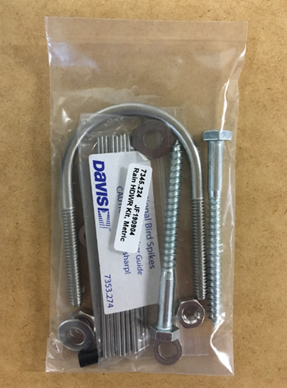
Package of bird spikes and U-bolt for possible mounting.
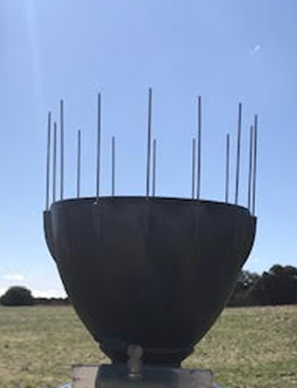
Bird spikes installed on the top rim of the rain gauge.
Solidly mount your rain gauge (i.e. will it move around at all in the wind) and level (check the level bubble)
Tipping bucket rain gauges need to be level and rigid for accurate operation. There is a level bubble inside the gauge to check for level (see below), and if the gauge moves easily by hand then adjustments should be made such that it’s firmly secured. We recommend mounting the rain gauge on the ground, secured to a paver or concrete block ($3 concrete Besser block from Bunnings) like shown below. If this is not achievable, then please ensure that the mounting technique is as rigid as possible using the U-bolt provided.
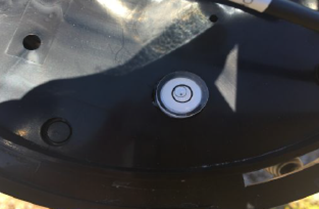
Level bubble should lie in the center of the black circle.
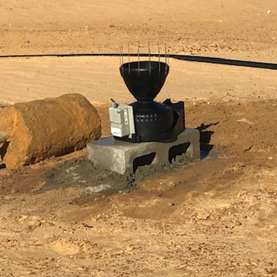
Rain gauge secured to concrete Besser block.
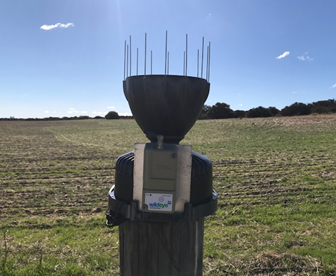
Rain gauge mounted solidly to a wooden strainer post.
Remove cable tie from inside the rain gauge and turn on data logger.
Once your rain gauge is mounted to be as rigid as possible, take the cone of the rain gauge off and remove the white cable tie which is restricting the tipping mechanism from moving. An arrow is pointing towards the cable tie below. It is vitally important that this cable tie is removed as it will stop the tipping mechanism from moving during a rain event. Once the cable tie is removed, hold down the test button (or swipe logger with a magnet) on the data logger for 5-6 seconds until the blue flashing LED stays solid. The LED light should then flash blue before turning solid green which indicates your data logger is on and ready to register rainfall.
Deleting artificial/test data
When Installing or maintaining rain gauges it’s typical to cause the artificial registration of some “rain”. Please email mailto:support@mywildeye.com to request removal of any such data (please tell us the name/serial number of the rain gauge and the date/time of data to be deleted).
Repairs and servicing
If you find any damage or other issues of concern during rain gauge maintenance, please take photos and email them to support@mywildeye.com for assistance.
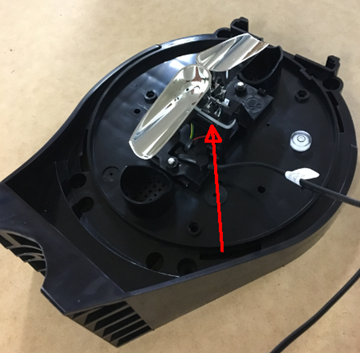
Cable tie which restricts movement of the tipping mechanism which needs to be removed.
