Seametrics AG90 and AG3000 - Wiring/Programming
Tools required:
Protective Eyewear
Needle nose pliers
Wire strippers
Wrench
Eyeglass screwdriver or micro screwdriver
Metric Allen wrench 2.5 mm or Torx screwdriver T15
Soft tape measure
Installation Materials:
1 x Wildeye Cable (part# WILD-CAB-M12-M-5)
1 x Seametrics Cable Gland/Stain Relief (part# 103028-01) - There should be a clear bag, zip tied to the neck of the flow meter containing 2 of these gland nuts.
WARNING: Seametrics may void the warranty if substitute part/solution is used. Diligence should be taken when securing the gland nut to prevent water intrusion which is always a possibility when equipment is in the elements.
Note: Two different telemetry wires can not go into the same pins. i.e. If one is going to a fertigation system and one is going to the wildeye. That will not work.
Instructions:
Flip white face cover open and unscrew the green lid
Use micro screwdriver to unscrew 3 face mount screws and set aside in a safe location. Newer models: unsnap display assembly from hard plastic anchors.
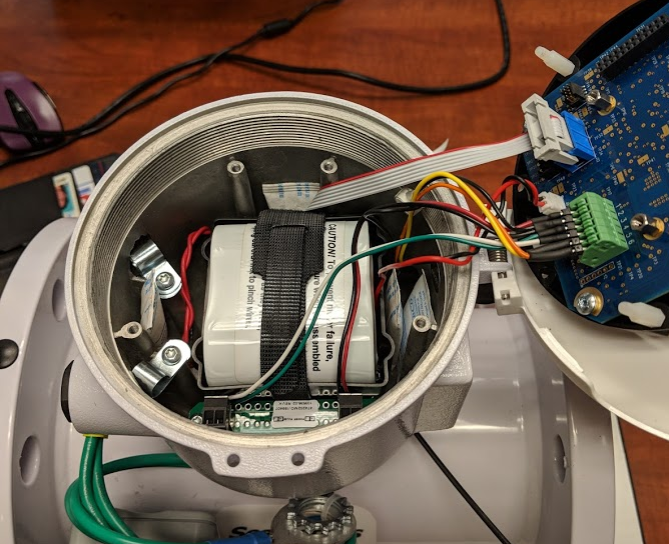
Pull out meter face and expose battery pack
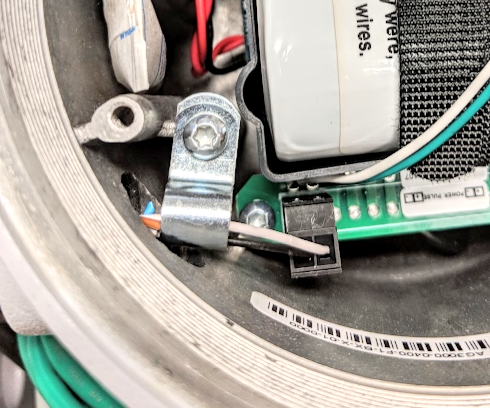
Unscrew cable gland plug “Power/Output Cable 2” located closest to the terminal strip (left hand side). You may have to use a wrench and/or pliers to remove it.
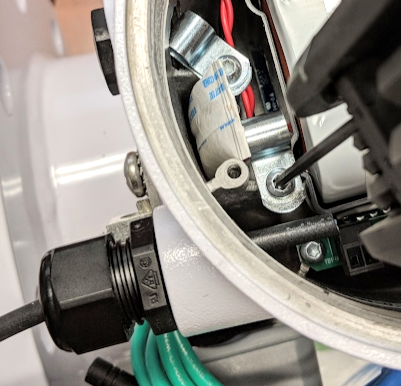
Insert Seametrics Cable Gland and screw into opening.
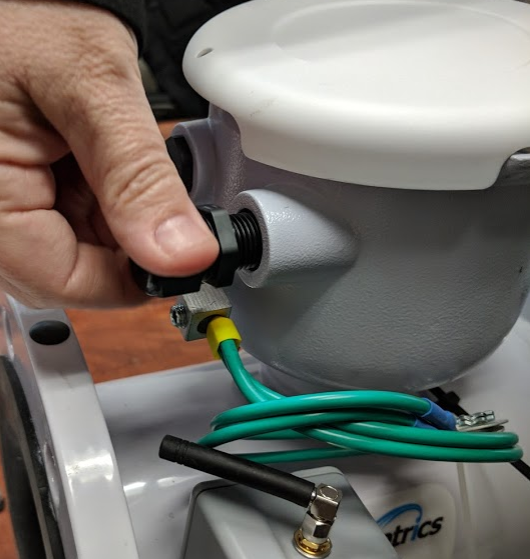
Using a T15 Torx (or 2.5mm Allen key), loosen the metal clamp. Insert Wildeye cable through Seametrics gland and through metal clamp.
Strip the wires back on the cable, black (GND) and grey (Counter) wires only.
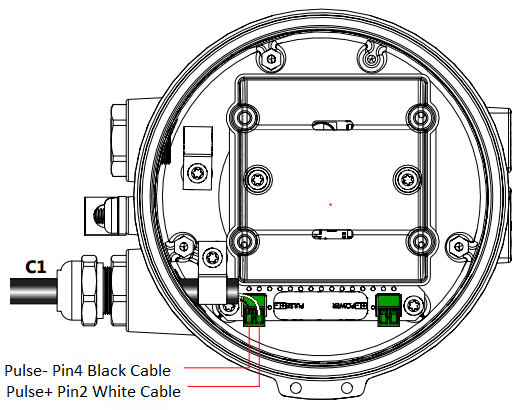
Using pliers, remove the “Pulse Output” terminal connector. It will be located right next to the Wildeye cable. Clamp down on it with needle nose pliers and pull it out gently.
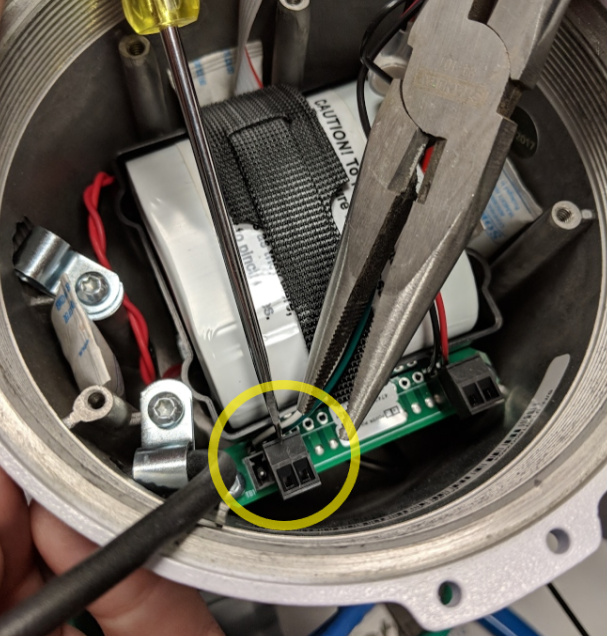
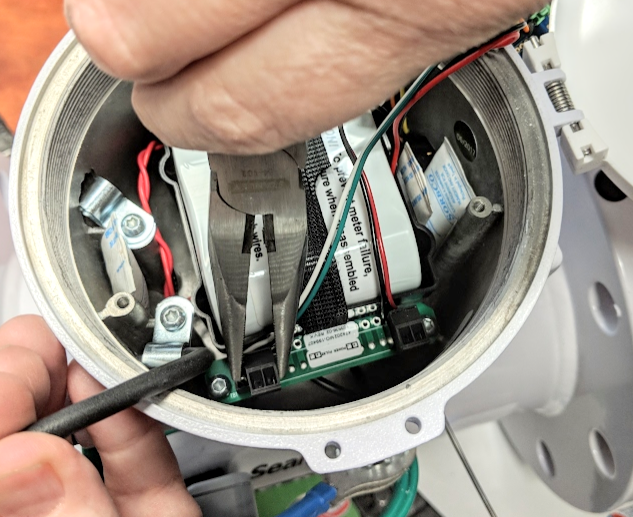
Connect black and grey wires to terminal connector, as per photo.
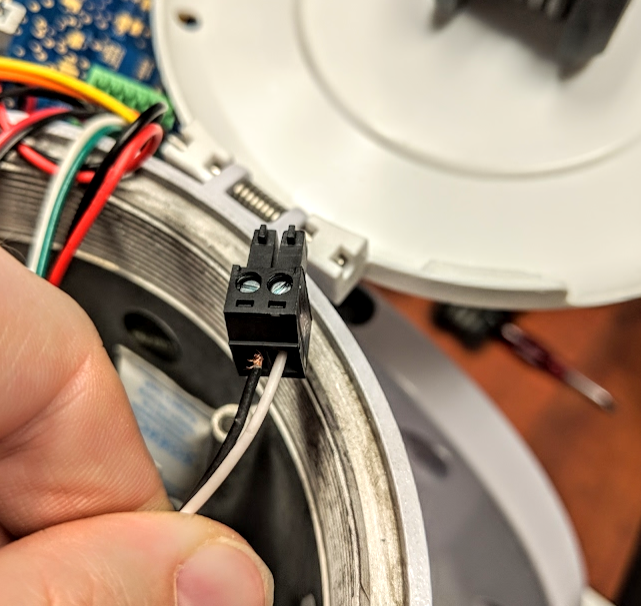
Press/snap terminal connector back in
Re-install the battery and digital face. Carefully, use micro screwdriver to get 3 screws back in. WARNING: If screw drops, it will be lost in the belly of meter forever. Newer models: snap display back into place.
Screw green lid back on and close white face cover
Seametrics cable gland nut must be sealed with tape or sealant. Secure to ensure water ingress is not possible, keeping in mind that too much force may break the seal
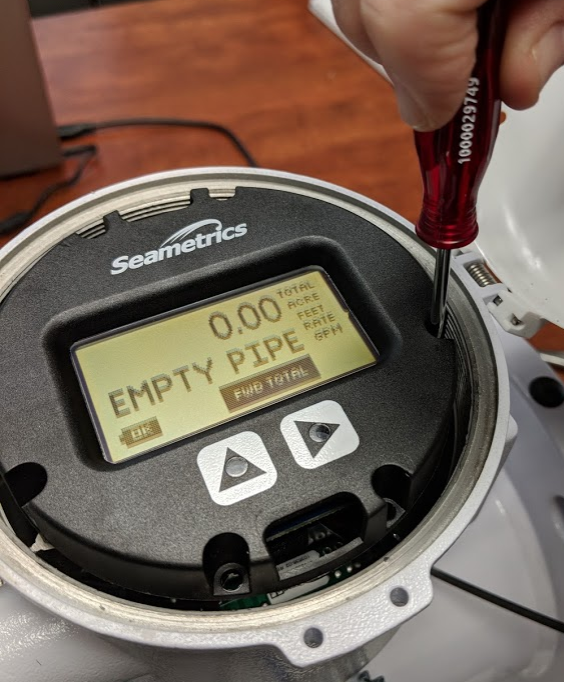
Setup the meter ID for all new meters, you will know you've completed this step when "SET ID" has disappeared from the screen
Recommendation: Take pictures of the serial number and meter face to capture totalizer. Use soft tape measure to determine the diameter of the pipe. Submit the pictures, pipe diameter & Wildeye logger op# to: info@mywildeye.com
Program Meter
The AG90 & AG3000 have light sensors under 2 buttons. This makes programming challenging in the sunlight and requires lots of patience. If you accidentally select a new passcode or get a wrong setting, make sure to go through steps to fix it.
Hold the up button and tap with right arrow button to enter/exit.
Passcode:00000(0)
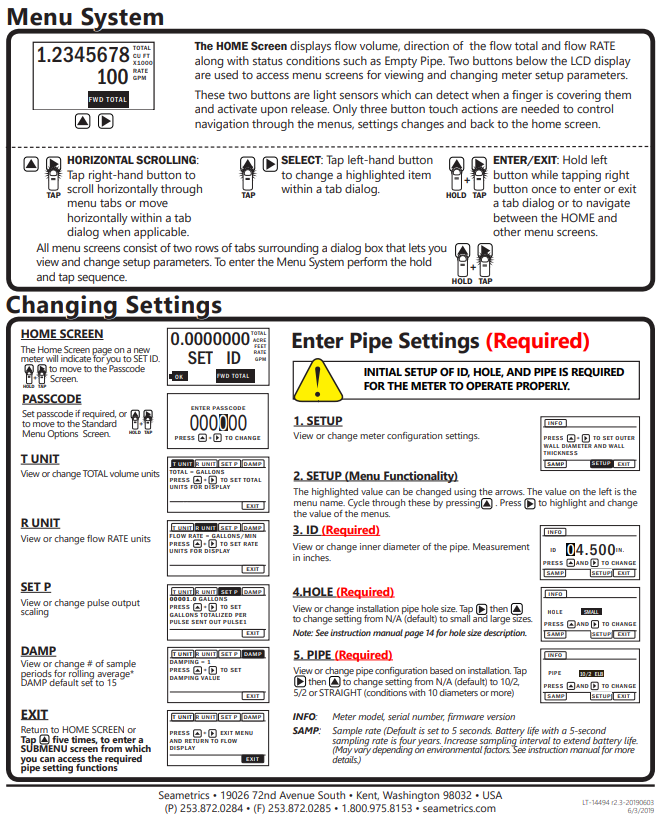
Setting up the flow meter:
It is always recommended that a picture of the Set P is taken for future reference
To determine the pipe size to set the pulse, use the sticker on the side. The diameter of the meter is the first 2 numbers after either AG90 or AG3000. In this example the meter is 08, which means 8”

Pipe Diameter | Set T | R Unit | Set P | Damp |
Less than 10" pipe | Acre Feet | GPM | 10 gallons per pulse | 1 |
Greater or equal to 10" pipe | Acre Feet | GPM | If the meter will run more than 6000GPM set to 100 gallons per pulse. If the meter will run less than 6000GPM, set to 10 gallons per pulse | 1 |
The standard wildeye counter input is safe up to 10 pulses per second.