Note: These features can only be accessed by Client Admin users. Your Wildeye devices may be managed by a third party as a service.
Note: Inviting users is a feature belonging to the Identity User system. If the pages below aren't available for your client, please get in touch with Wildeye and we will enable the Identity Users system.
Overview
User Management is available in the Users tab for each Client. From here you can manage active users, view any pending invitations and Invite new users.
Invite Users
To invite a new user to your system, go to the Invite User Tab and follow 3 steps:
-
Add one or more email addresses of users that you wish to invite to the system, separated by a space.
-
Select the permissions that these users will have, then click Add. You can add multiple permissions if you would like the users to have access to more than one resource.
-
Type - The Type can be Group or Client. Select group if you only want the invited users to have access to a group of Sites (manage your groups in the Group tab). Select Client if you would like them to have access to an entire client.
-
Role - Select the Role that you would like to grant them (either full admin rights or 'View' only.
-
-
Review and click the Send Invite! button. This will email your new users with an invitation.
Users will create their own passwords when they accept the invitation.
After sending the Invite, you will be taken to the Pending Users tab. This shows a list of users that have been invited to the system. They will appear as pending invites until they have accepted the invitation email that they have been sent.
Your newly invited users will receive an email similar to below:
Upon clicking the Accept Invitation button, your users will be taken to a page to create their own password.
If the users have already got an identity in the Wildeye platform then they won't need to create a password, they simply need to accept the invitation and they will be granted access to the new resources you have invited them to.
Managing Users
Once a user has accepted an invitation, they will appear in your Manage Active Users tab. This gives you an overview of all of your users and what they have access to.
You can edit the permission of a user at any time by clicking on the Edit link.
From this screen, you can either remove some permissions, or remove the User entirely.
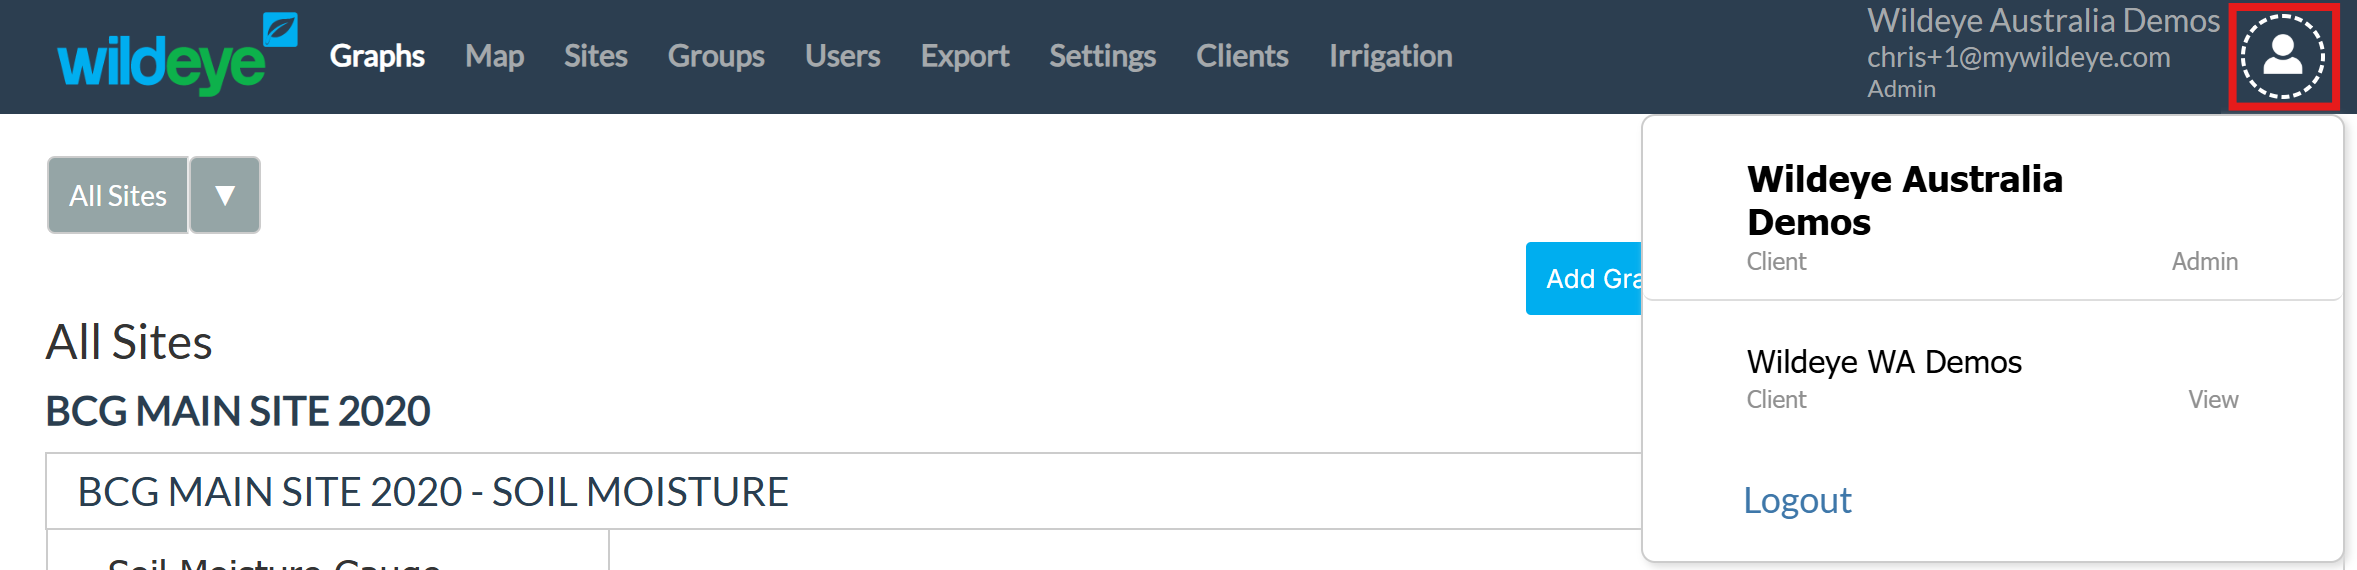
One user across multiple clients
An advantage of the Identity User system (described above) is that you can invite a single user to multiple clients, using the process above. The clients which the user has access to will be shown if you hover over the top-right user icon, as shown below. Clicking each client in this panel will switch between client logins.