
What are Alarms?
The Wildeye Alarm system is a mechanism where emails and/or text messages can be sent when your data matches predefined thresholds. You can send to individual recipients, or to pre-configured groups of recipients.
Wildeye supports a range of Alarm types. The alarm types available for an individual input depend on the input type, and the inputs configuration. Our most common alarm type is the High/Low threshold alarm, perfect for frost alerts, tank level alerts, etc.
Alarms can be configured to trigger “immediately”, or with a delay/buffer to ensure the value read has crossed the threshold for a number of readings or a particular time period. When configuring alarms it’s important to consider the immediacy of the notification required.
Most of these features can only be accessed by Client Admin users. Your Wildeye devices may be managed by a third party as a service. Jump to Client User features here.
How they work behind the scenes
While some alarms can be evaluated on the logger itself and then trigger the logger to upload the latest readings to our servers to send the notifications, other inputs values are only calculated on the server. The alarm notifications for these alarms will only be sent after the logging interval of the logger, plus a period of server processing time. A common input type where this occurs is the Calculated Input, as these are all computed on our servers.
Server-controlled Alarm Example
Upload frequency: 1 day
Input logging frequency: 15 minutes
Calculated input: <RawInputReading> * 0.5
We now set up an alarm on the calculated input to trigger when it passes a threshold. The calculated input is computed on the server when the raw data readings of each input is uploaded. Once a day our server will calculate the calculated input on the uploaded readings for our input. After this calculation we test the alarm trigger against the data just calculated.
The greatest delay we can see before an alarm is triggered is 1 day, plus upload and processing time on the server.
Where to find Alarms
Input Settings
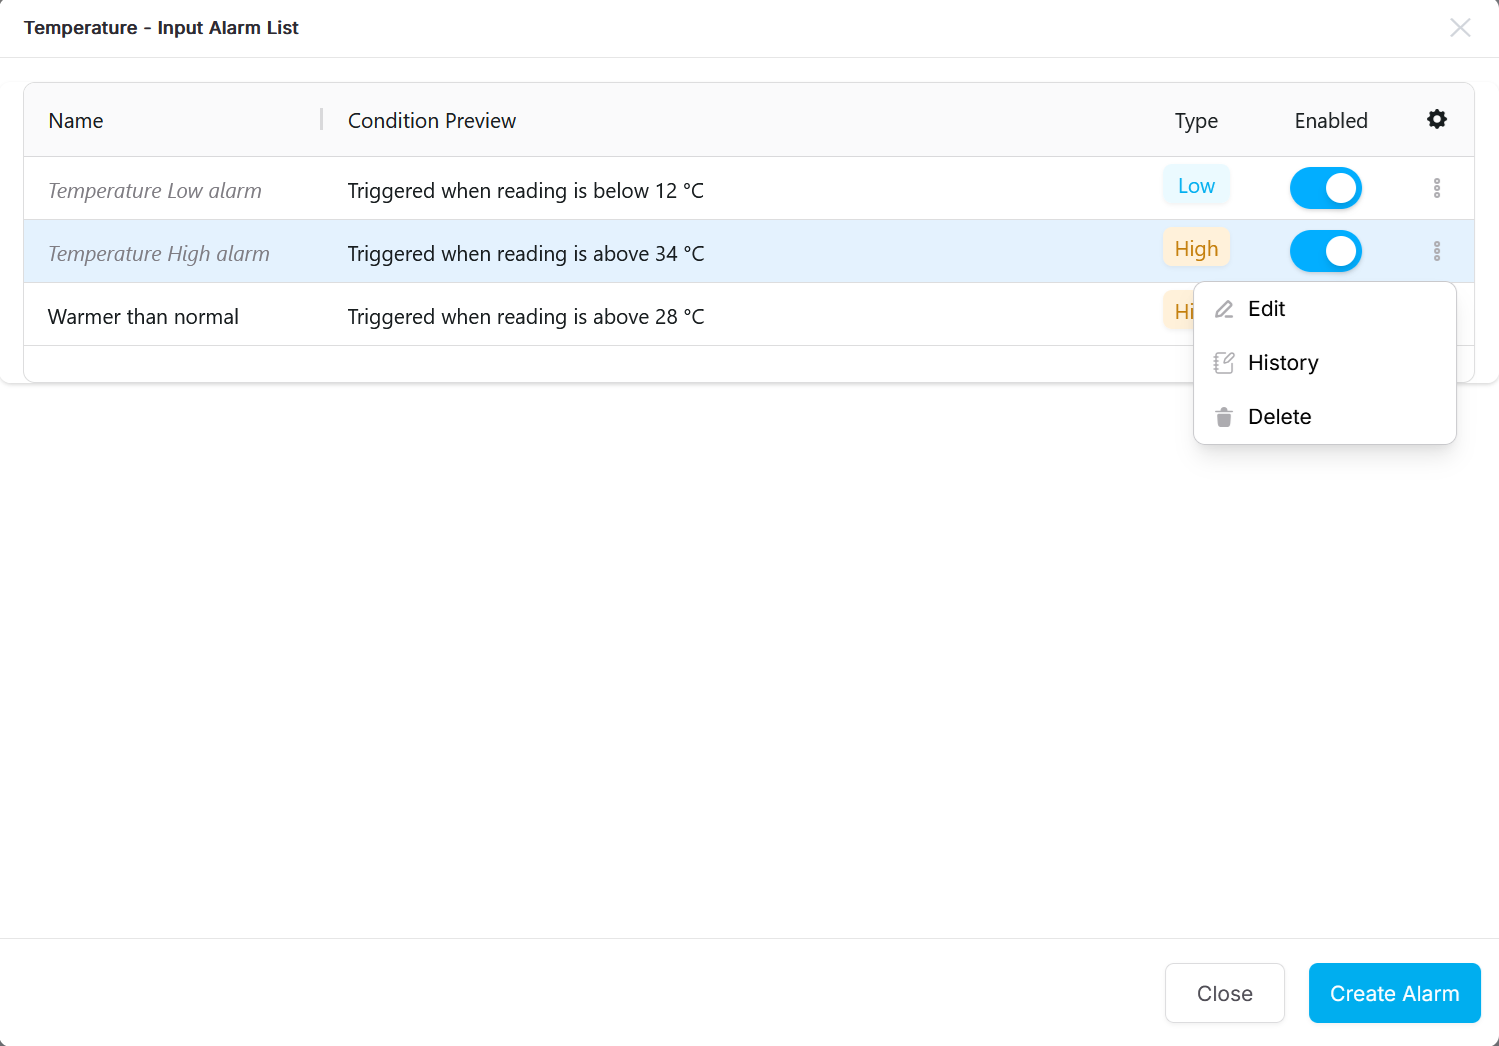
Alarm configuration for an input is accessed by clicking on the input’s alarm count link, on the Input Settings page.

The Input Alarm List shows the alarms associated with just this input. This is where you can create a new alarm for an input, enable or disable an alarm, access an alarm to edit the threshold value or the notification recipients, and access the history. Some of these features are only available for Admin logins.
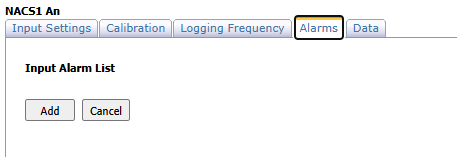
Previously (before Oct 2025) you could access an Alarms tab when editing the configuration of an input. We have removed access from this screen as part of our future plan for updating the inputs page and configuration of inputs updates.
Graph View of Alarms
For administrators (and recipients of associated alarms) we display a blue bell icon on any graphs which include a series with alarms configured. Clicking on the bell icon in the top right corner of the graph will open the list of alarms. From here you can edit the alarm, or enable or disable the alarm(s).
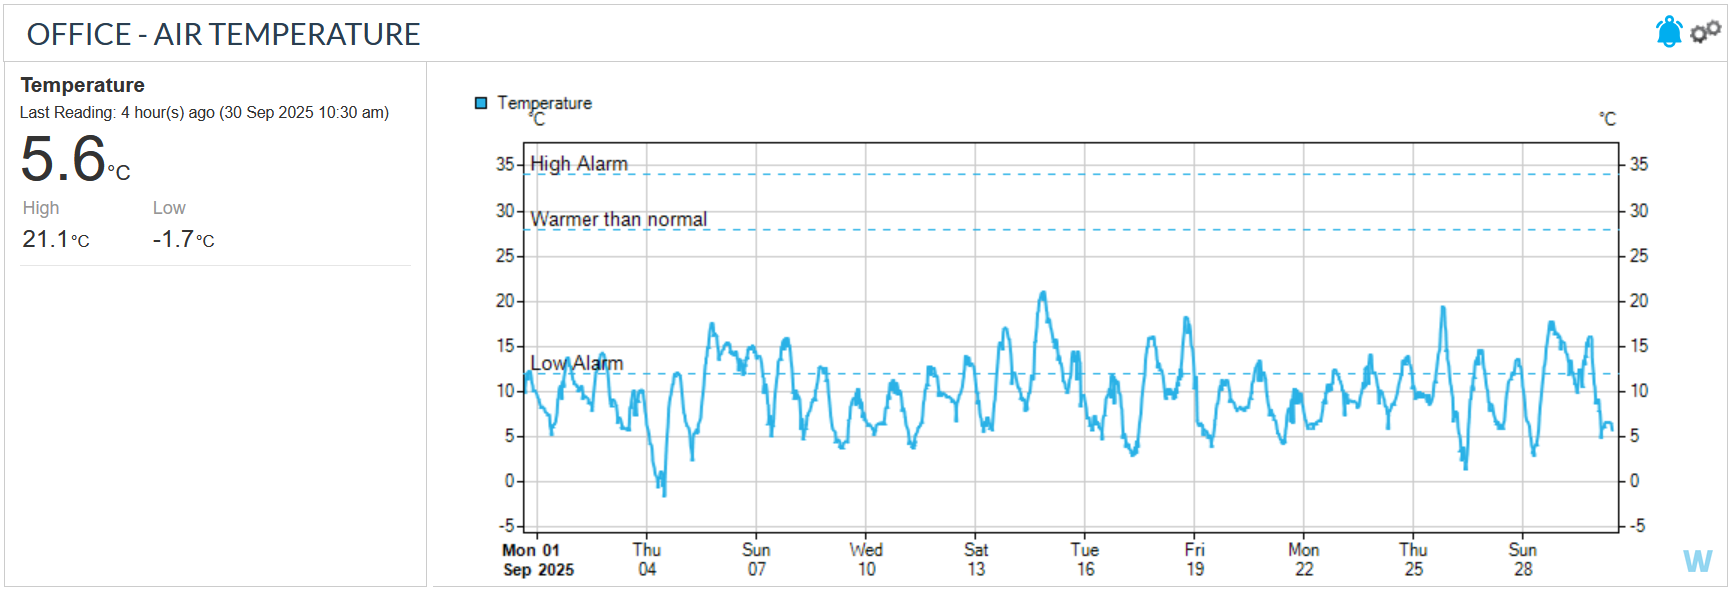
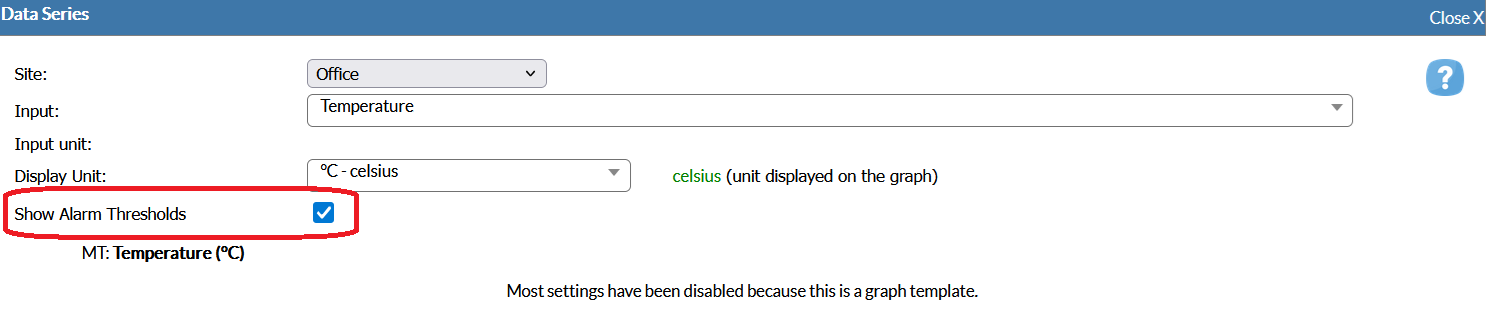
On a graph you can choose to show the alarm thresholds for an individual series. Edit the series by clicking on it in the legend, and then choose the option “Show Alarm Thresholds” to get the named horizontal threshold lines included on the graph.
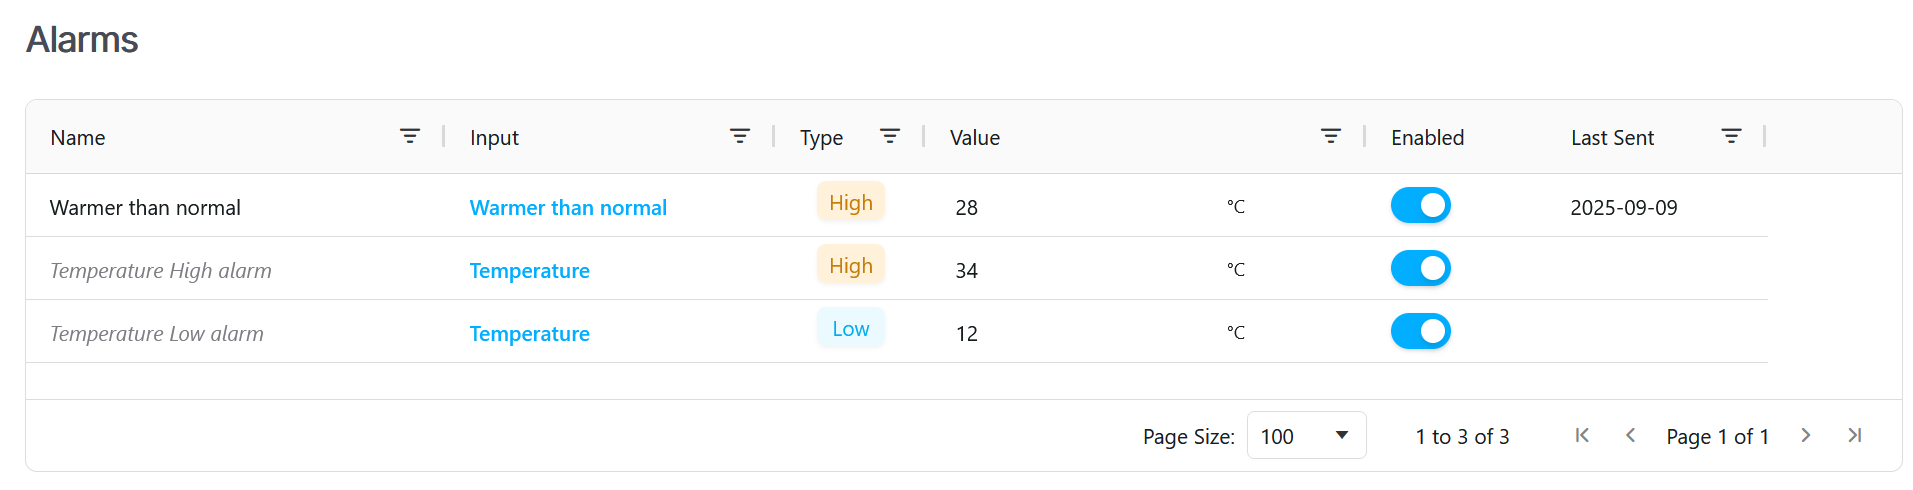
Client View of Alarms
The client’s view of alarms allows you to see all the alarms configured across the client, by clicking on the Alarms tab. From this table, you can filter and search for known alarms, then edit or enable and disable the alarm. This is very useful when needing to disable a selection of alarms at the end of a harvest.

Types of Alarms
-
High/Low - Alarm by a specific high or low input value. Eg:
-
Irrigation events to detect burst pipes
-
Frost alarms at a certain wind and temperature thresholds
-
-
Daily Total Volume - Total flow today greater than X
-
Minimum Night Flow - Minimum flow between time A and time B measures greater than X. A useful alarm to monitor for leaks from water consumption systems.
-
Weekly Minimum Night Flow - When the minimum night flow consistently measure above the threshold for over a week; useful if some nights are expected to have data coming through.
-
Yesterday's Total Volume - similar to Daily Total Volume but for the previous day; useful for loggers that only upload once a day to ensure the alarm measures the total data received from the day before.
-
Last X Days' Volume - similar to Total Volume but for a specified number of days.
Alarm Configuration
When you create a new alarm, you are presented with a popup window with 2 tabs: Conditions and Recipients.
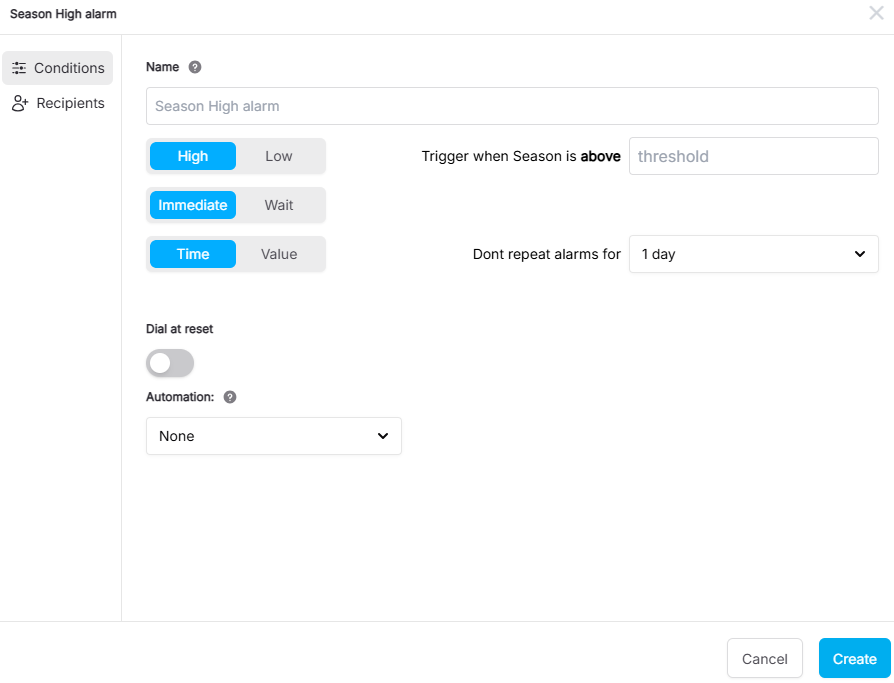
Conditions
This tab defines the triggering conditions for an alarm, specifying when it should activate, how often it should repeat, and any additional automation to run. The tab is different for each alarm type.
Recipients
On this tab you define who will receive notifications when the alarm is triggered, and the message they will receive.
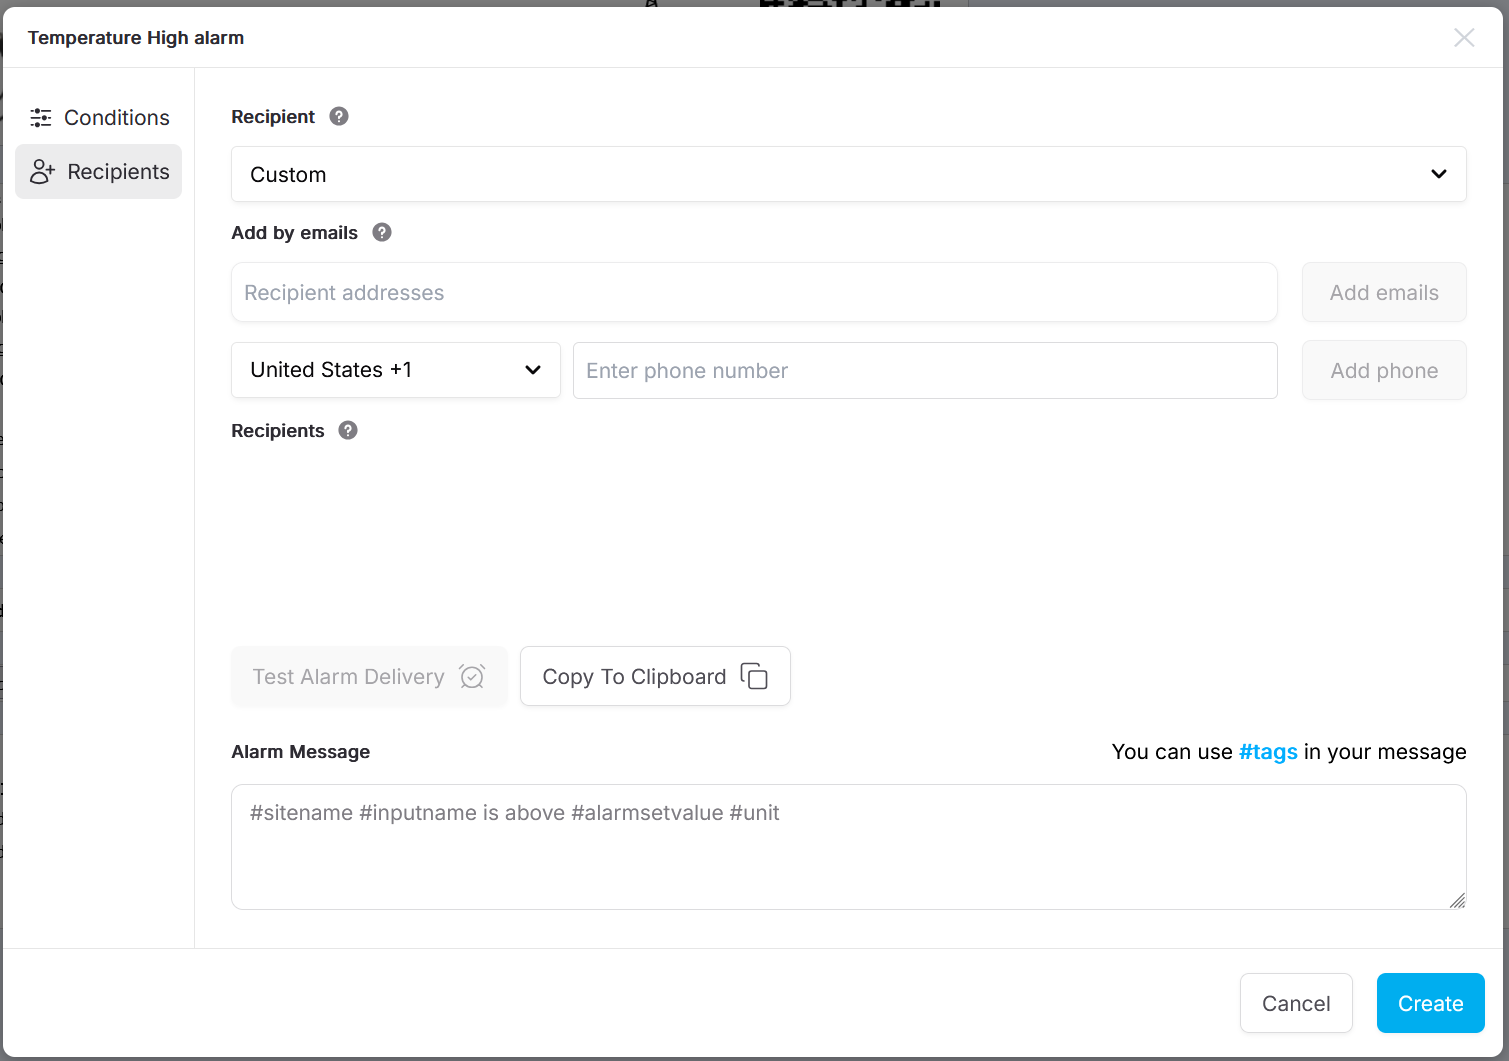
Recipient Type
-
Dropdown: Recipient
-
Custom – Enter specific recipients manually.
-
Recipient Lists – Select a predefined group of recipients created for this client. These lists can be reused across multiple alarms for consistency. Read more about Recipient Lists.
-
It is not possible to use a recipient list and add custom recipients to an alarm.
Add Recipients
You can notify recipients by email and/or SMS. Multiple addresses or numbers may be added.
-
Add by email
-
Enter one or more email addresses.
-
You can also search and select registered users from the user directory.
-
This field also accepts a pasted list of email addresses.
-
-
Add by phone
-
Select the country code from the dropdown.
-
Enter the phone number in the text box.
-
Click Add phone to include the number in the Recipients list.
-
-
Recipients list
-
Displays all recipients currently added.
-
Each entry shows the selected notification methods (Email/SMS).
-
For each user, you may choose whether they receive an email, SMS, or both. Click on the icon representing the communication method to toggle it on/off.
-
-
Test Alarm Delivery
-
Sends a test notification to all listed recipients.
-
-
Copy To Clipboard
-
Copies the recipient list so it can be pasted into another alarm configuration.
-
Test Alarm Delivery: This option is disabled until changes are saved with Create/Update.
Alarm Message
Type the message here which you want the recipients to receive. You can customise the wording of the notification. Dynamic tags insert alarm-specific details at runtime.
Default Example:
#sitename #inputname is above #alarmsetvalue #unit
Would produce:
West dam water level is above 2.75 m
Available Tags
|
Tag |
Description |
|---|---|
|
|
Name of the site |
|
|
Name of the input (sensor/log) |
|
|
Project reference ID |
|
|
Unit of measurement (e.g., °C, m) |
|
|
SCADA Tag ID |
|
|
When the alarm occurred |
|
|
The actual triggering value |
|
|
The configured threshold value |
|
|
When the alarm was sent |
|
|
Type of alarm (e.g., “High Temp”) |
Users may mix free text and tags.
Example:
Alert: #inputname at #sitename exceeded #alarmsetvalue #unit at #alarmdate
✅ Best Practices
-
Use Recipient Lists for common groups (e.g., “Operations Team”) to ensure consistent updates across alarms.
-
Always test alarm delivery after saving, to ensure recipients receive alerts as expected.
-
Keep alarm messages short but informative — include at least the site, input name, value, and unit.
-
Always configure a repeat delay to avoid alarm fatigue.